M aking newly joined members sign a Waiver Form has now become an integral part of the member onboarding process for mid-to-large size gyms and fitness studios. By now, as a fitness studio owner or manager, you would have realised that collecting and storing hard-copy form responses is a task in itself. To overcome this challenge, in this digital era, it has now become possible to send and store form response electronically on the computer. You may be well aware of Zoho Forms, a service that let's you create online forms. If not, don't worry, this step-by-step tutorial will walk you through creating your first form in Zoho Forms and also show you steps to connect it with your Okfit account.
Let's look at this guide to create a form in Zoho Forms and share it directly to members from your Okfit account.
- Login to Zoho Forms Account
- Create a Form
- Set Field Alias
- Setup Webhook
- Add Form to Okfit
- Share Form with Member
- In your Zoho Forms dashboard, from the left navigation menu, click Forms > My Forms
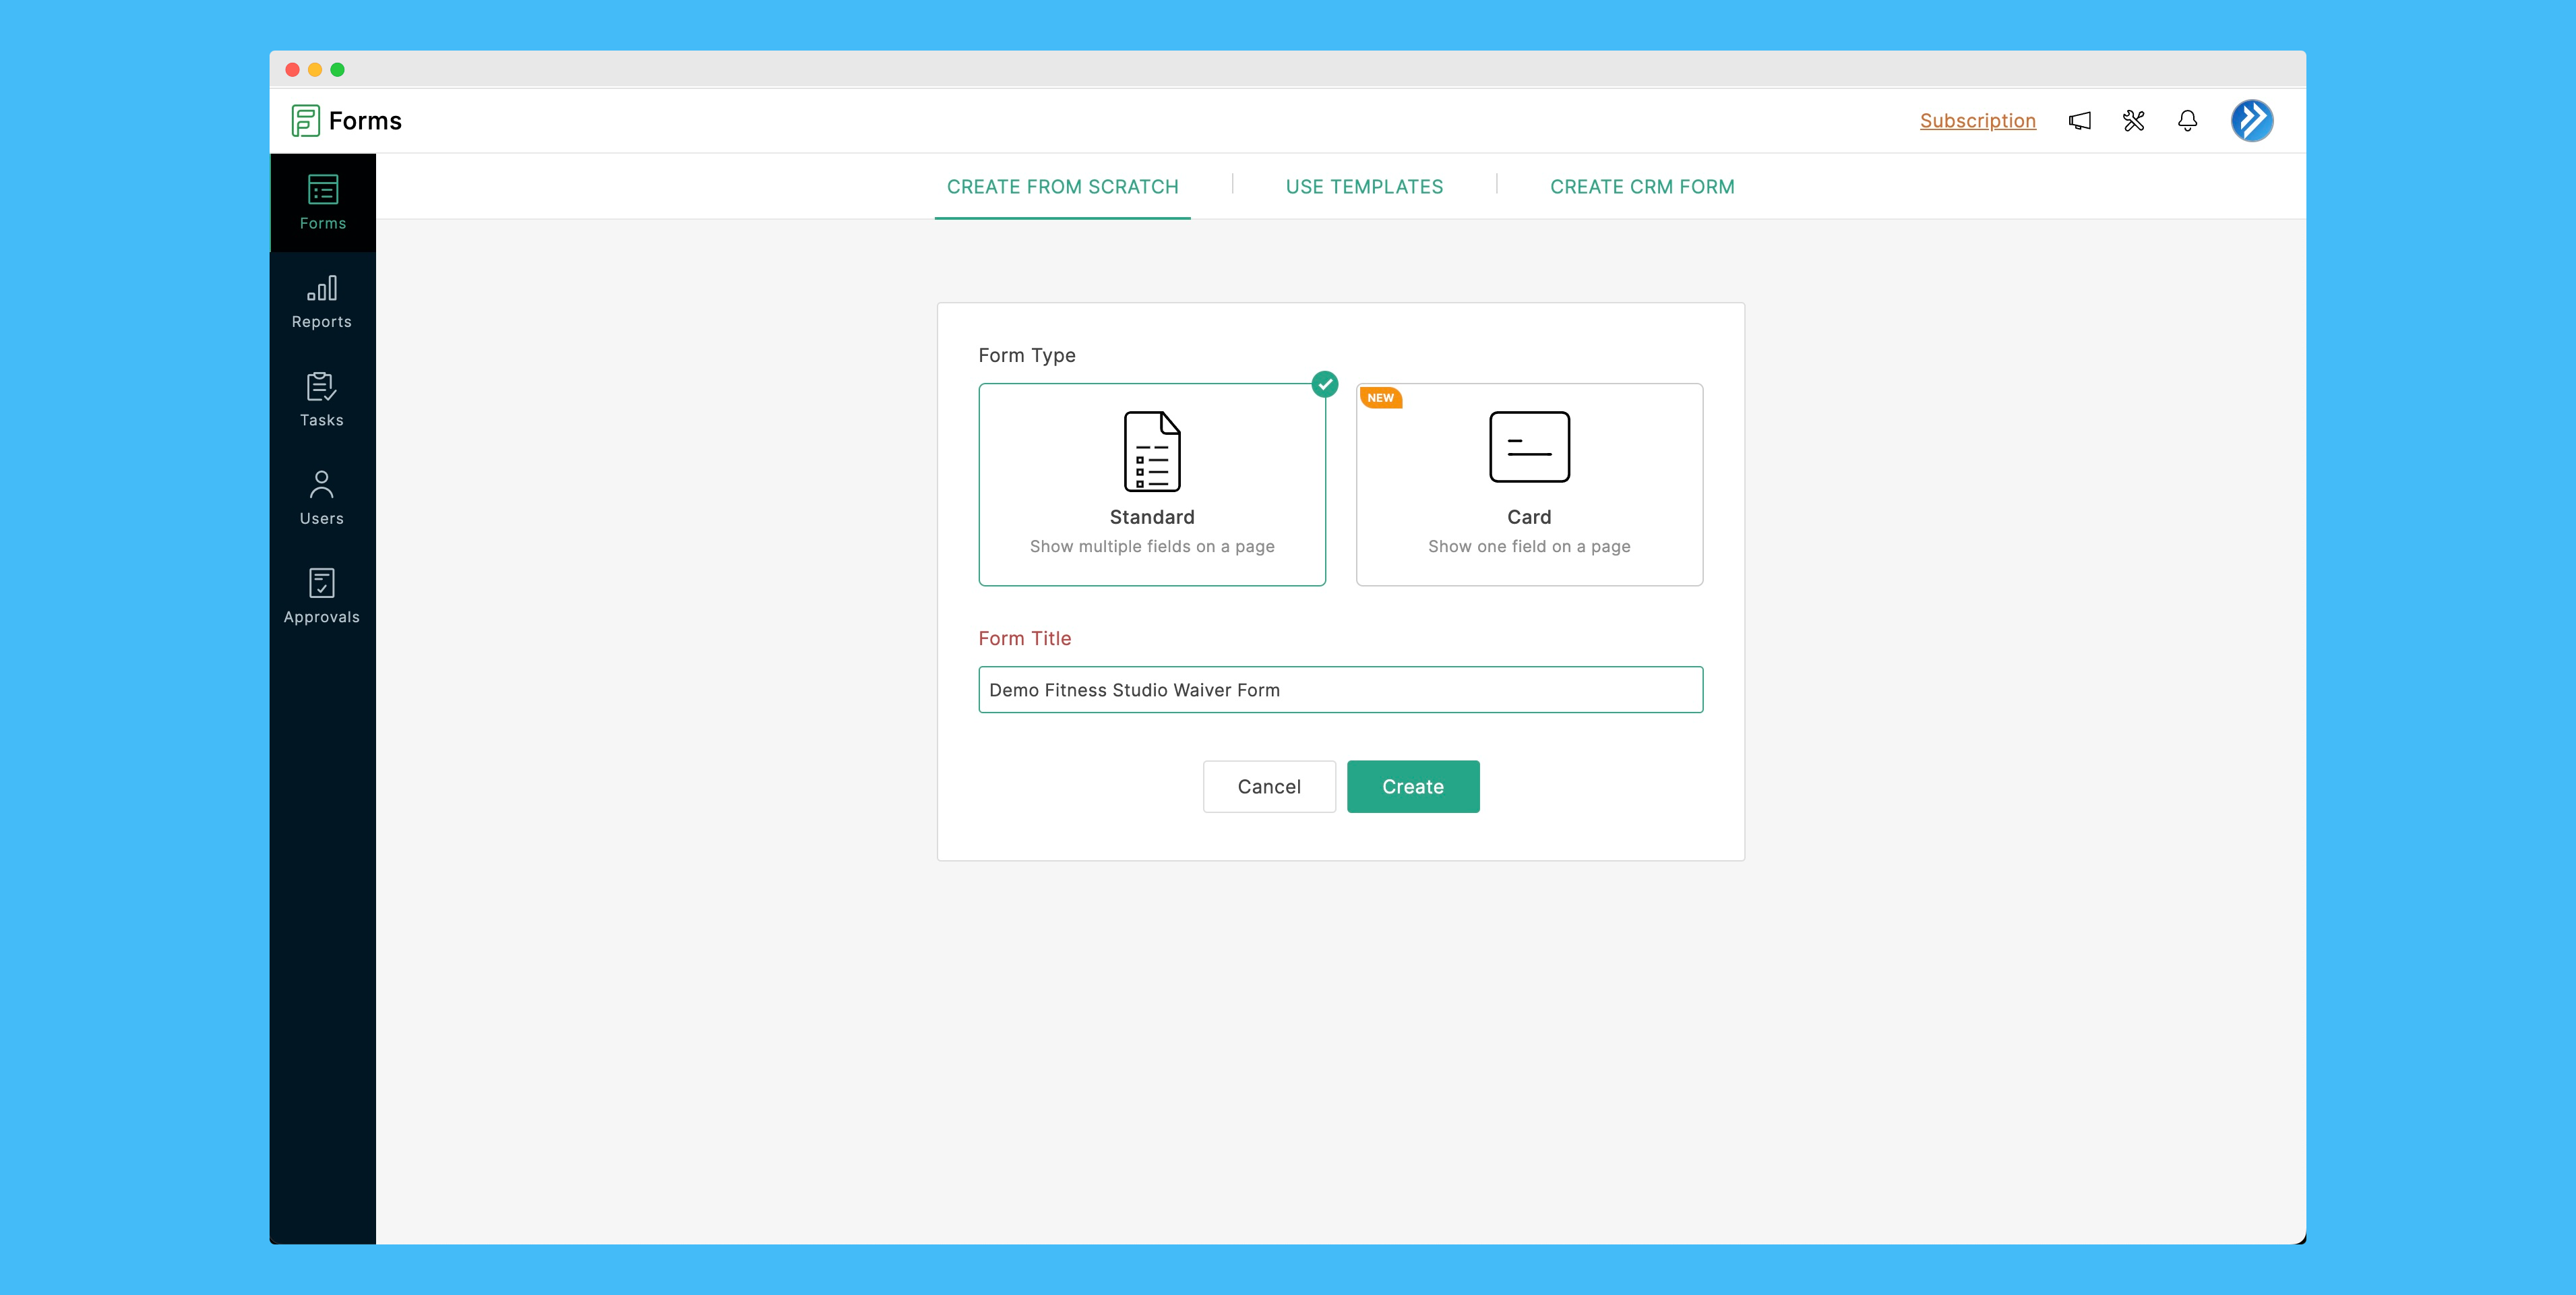
- Click the New Form button , enter Form Type and Form Title
- Click on Create
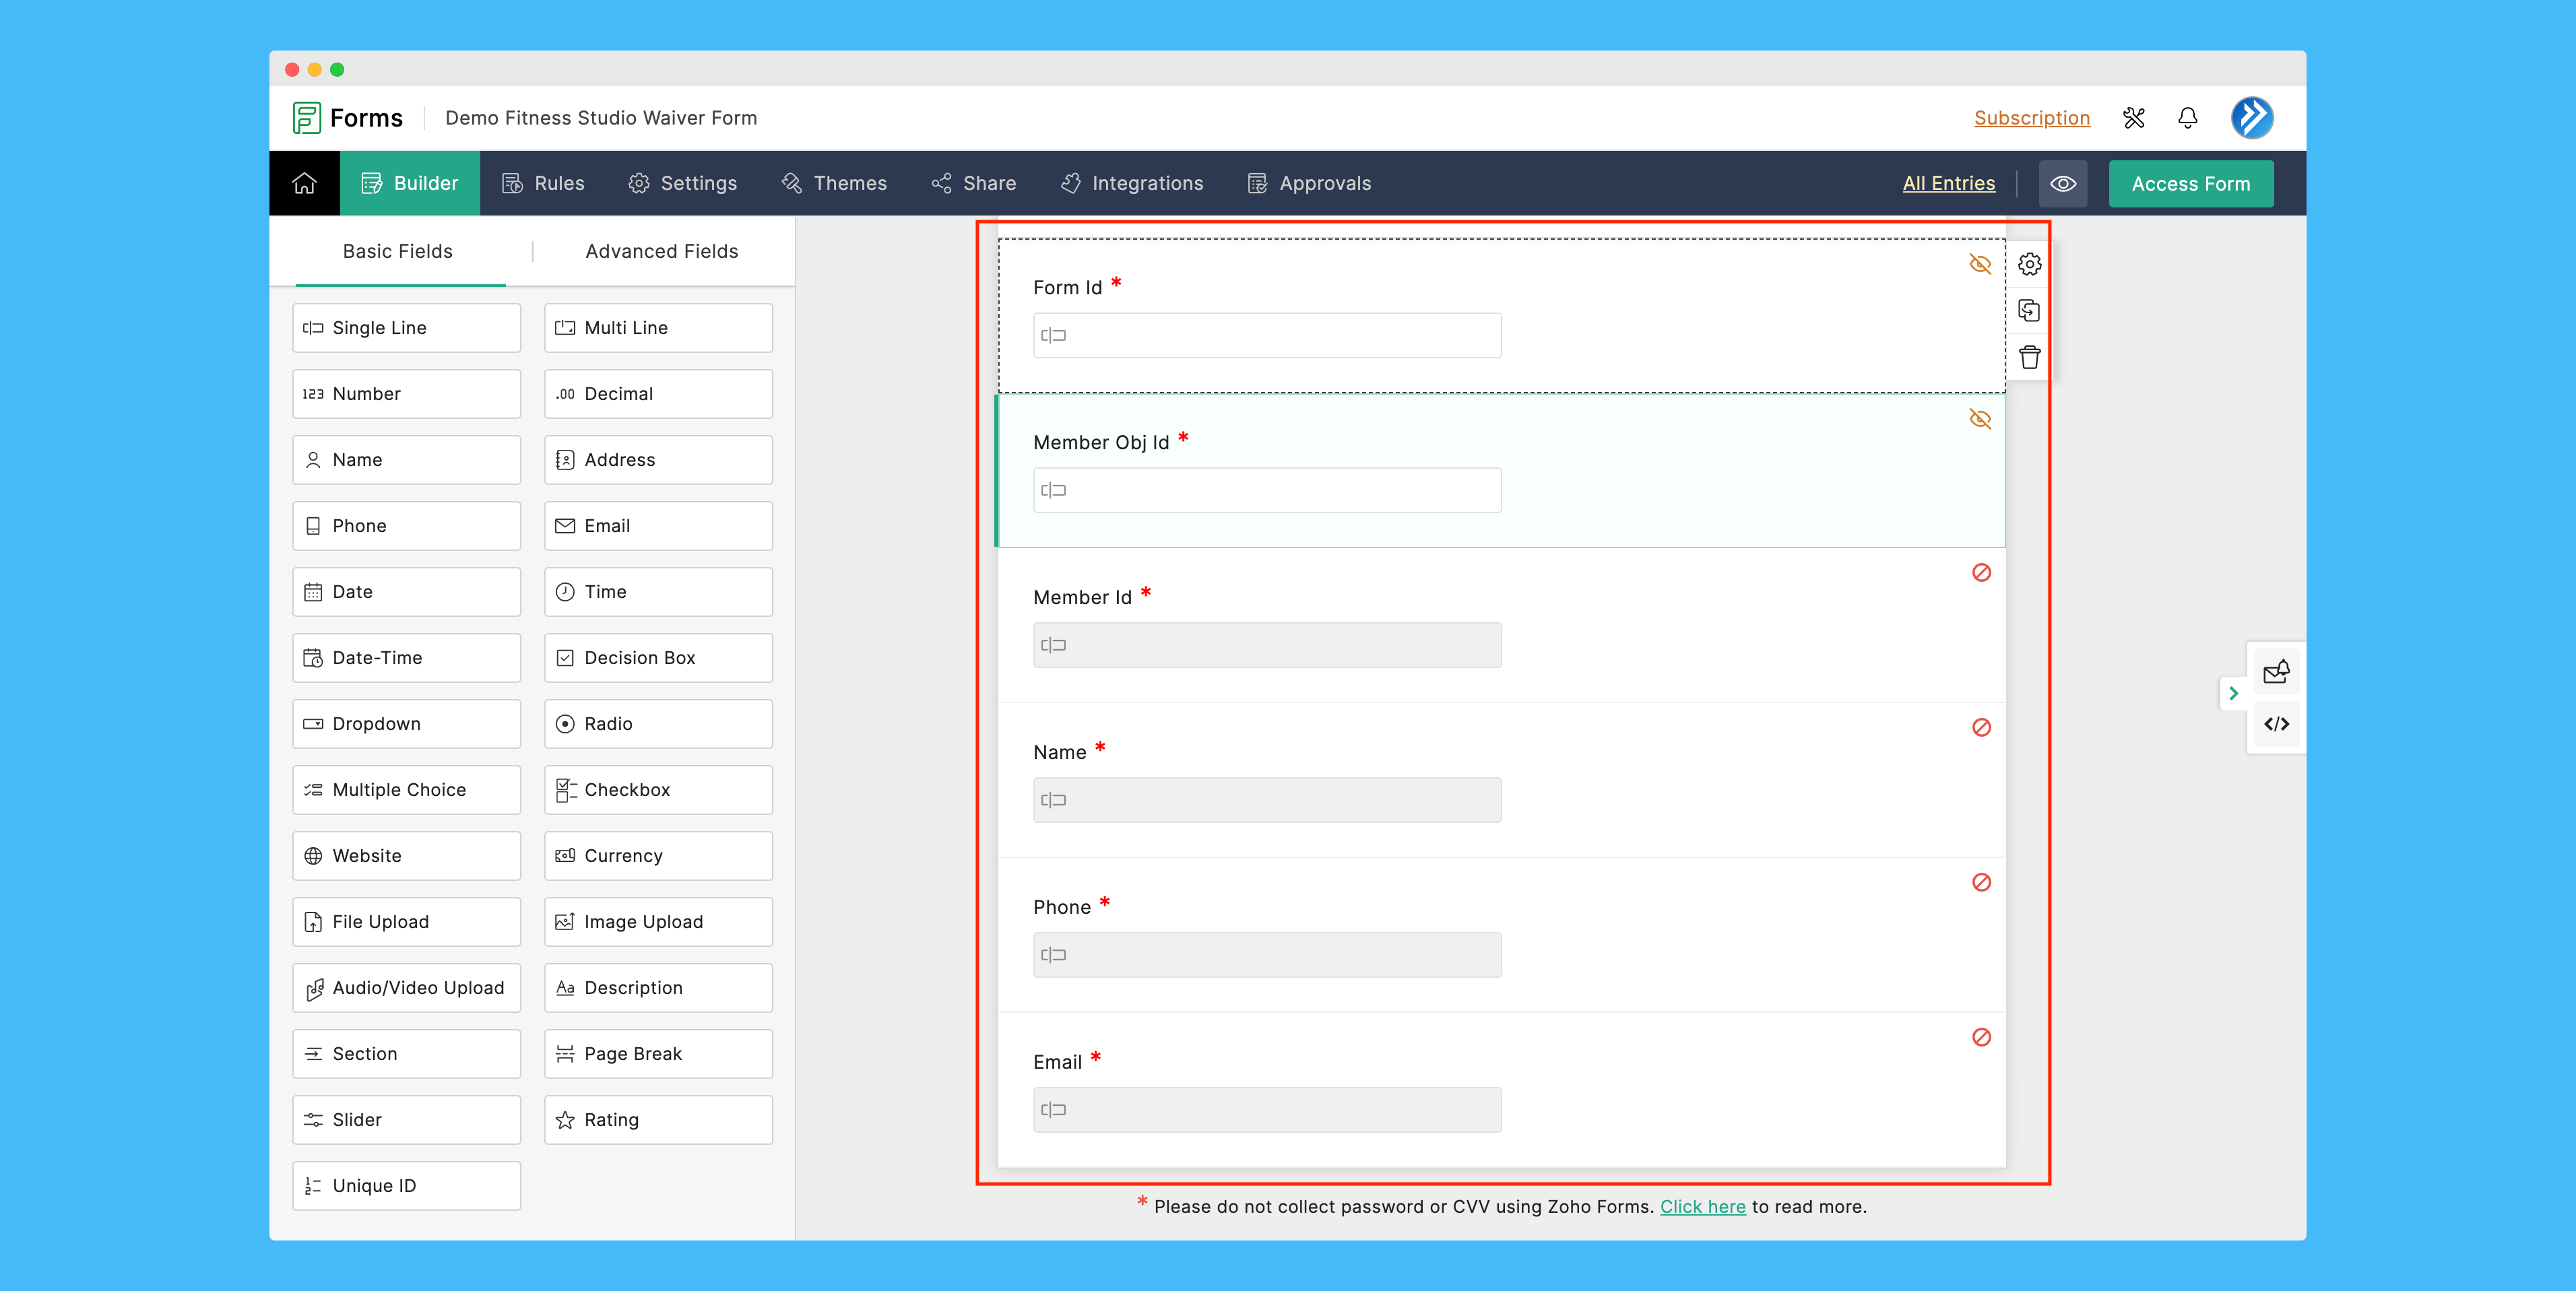
- Form Id
- Drag the Single Line field from Basic Fields type into the form. Click on the field to open Properties
- Enter Field Label as Form Id, and mark Validation as Mandatory, Visibility as Hide Field
- Click Save
- Member Obj Id
- Drag another Single Line field from Basic Fields type into the form. Click on the field to open Properties
- Enter Field Label as MemberObjId, and mark Validation as Mandatory, Visibility as Hide Field
- Click Save
- Member Id
- Drag another Single Line field from Basic Fields type into the form. Click on the field to open Properties
- Enter Field Label as Member Id, and mark Visibility as Disable Field
- Click Save
- Name
- Drag another Single Line field from Basic Fields type into the form. Click on the field to open Properties
- Enter Field Label as Name, and Visibility as Disable Field
- Click Save
- Phone
- Drag another Single Line field from Basic Fields type into the form. Click on the field to open Properties
- Enter Field Label as Phone, and mark Visibility as Disable Field
- Click Save
- Drag another Single Line field from Basic Fields type into the form. Click on the field to open Properties
- Enter Field Label as Email, and mark Visibility as Disable Field
- Click Save
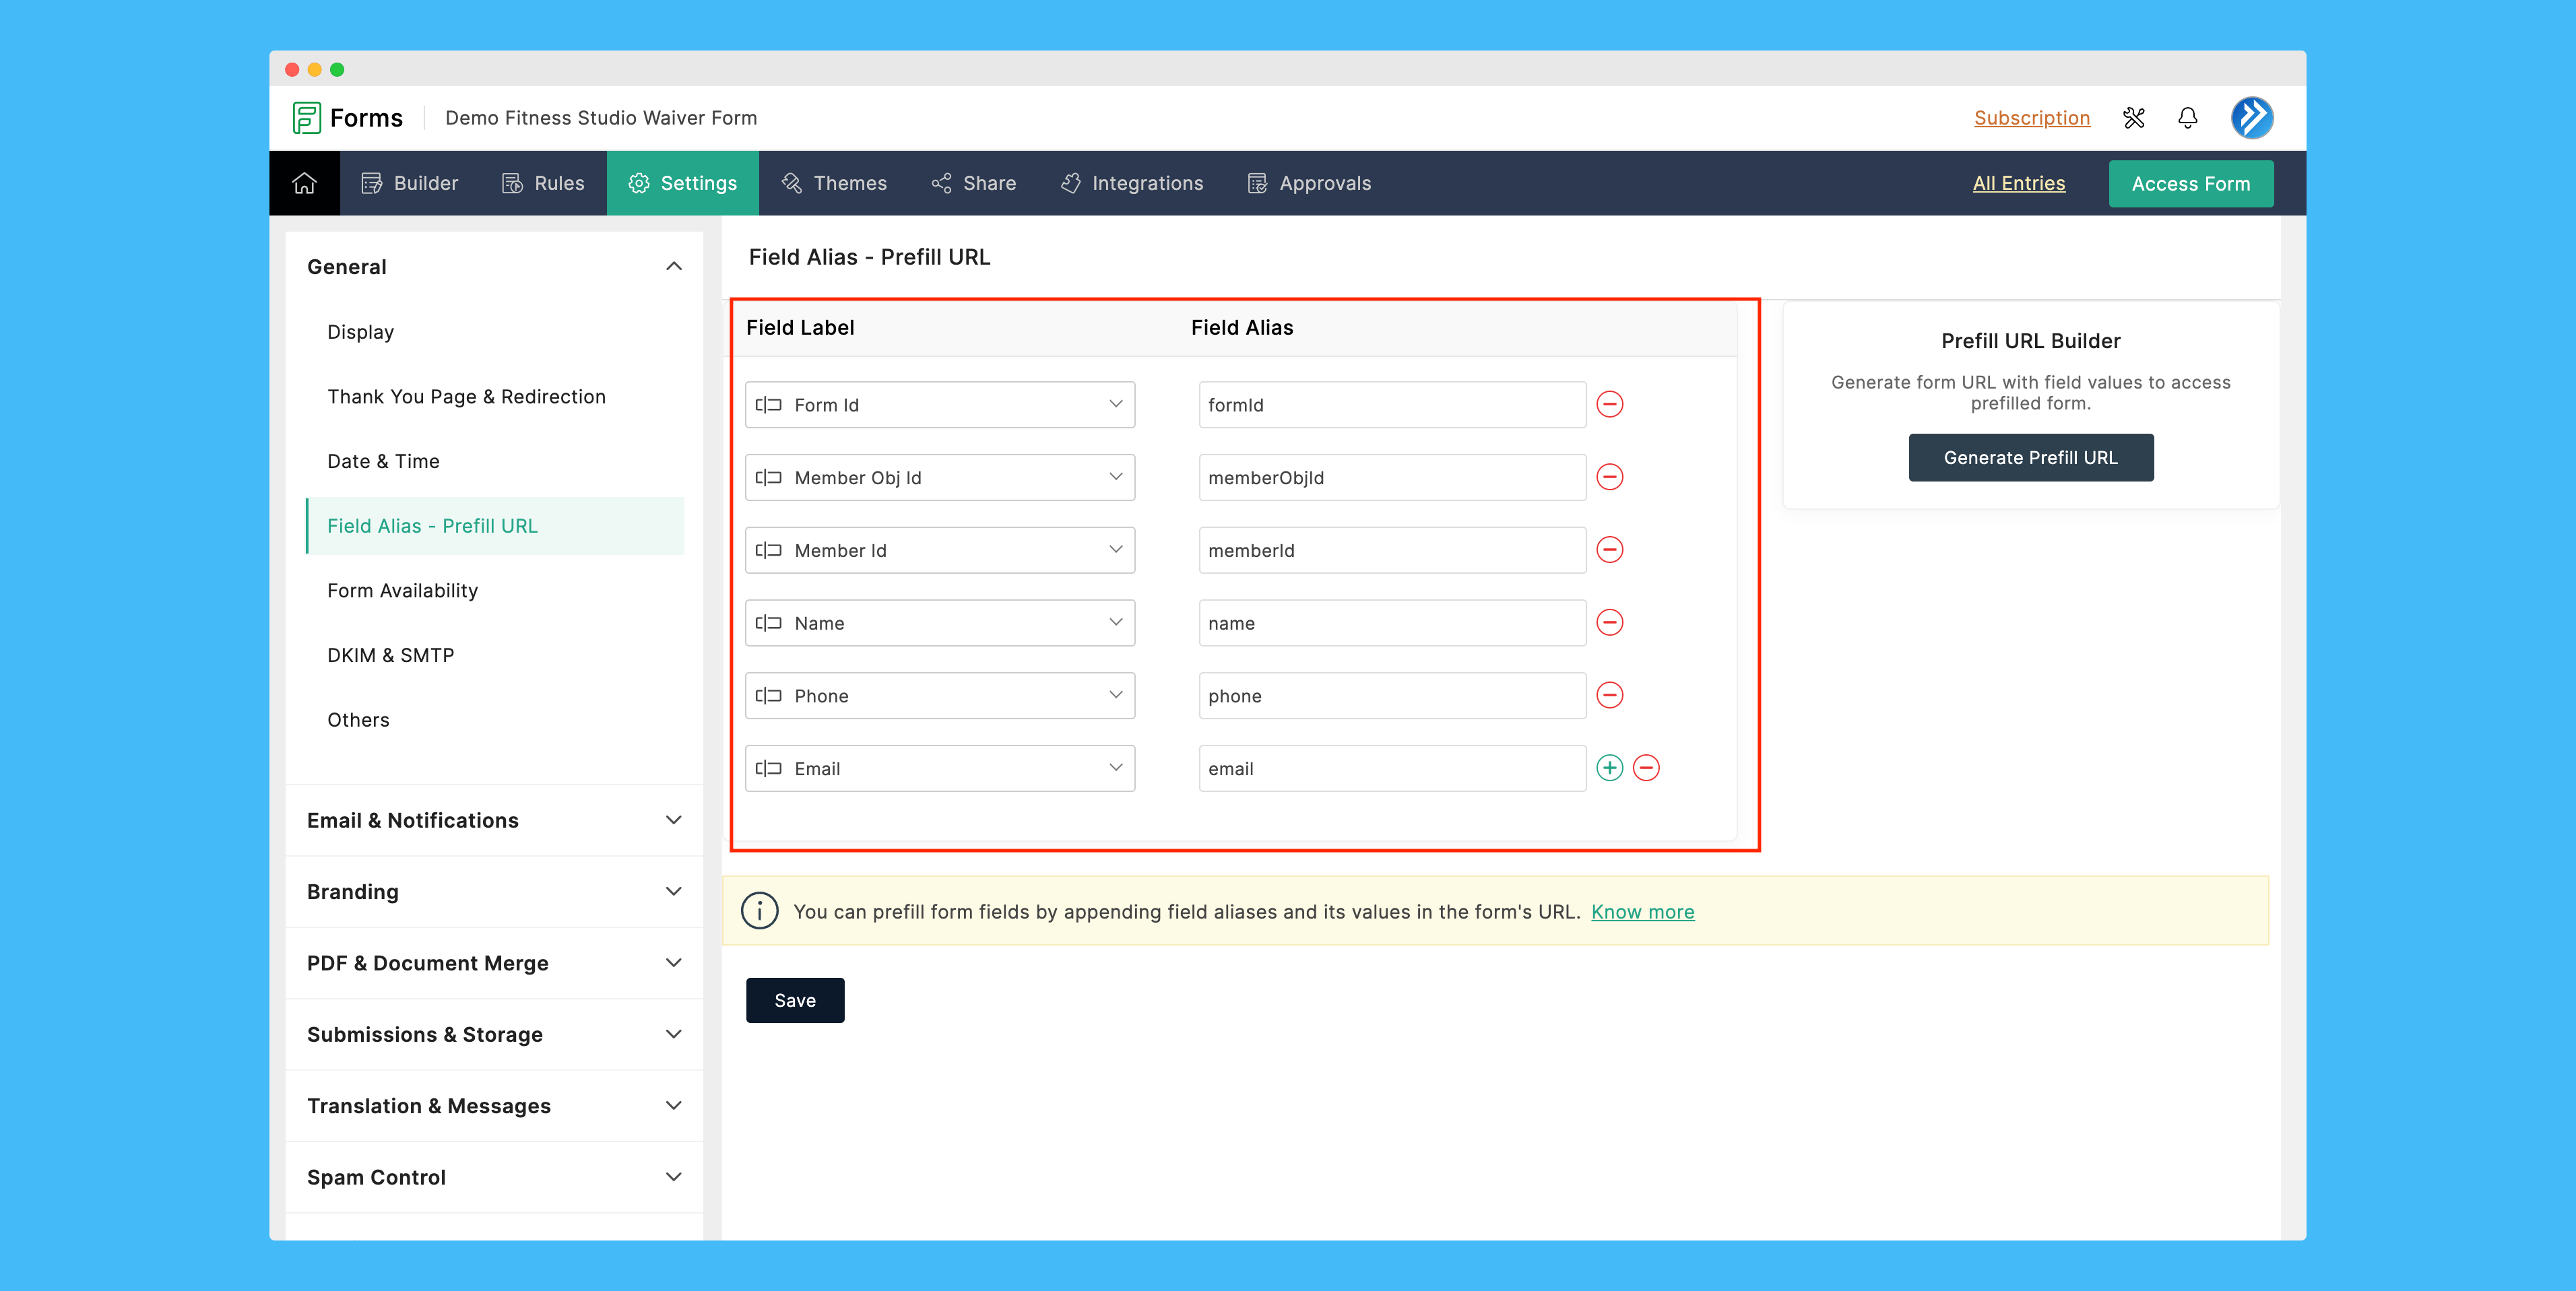
- Inside your form page in Zoho Forms, on the top menu bar click on Settings
- From the left navigation menu select Field Alias - Prefill URL option and click Configure Now
- Open the Field Label dropdown to select Form Id, enter Field Alias as formId
- Repeat for other fields as below
- Field Label: Member Obj Id, Field Alias: memberObjId
- Field Label: Member Id, Field Alias: memberId
- Field Label: Name, Field Alias: name
- Field Label: Phone, Field Alias: phone
- Field Label: Email, Field Alias: email
- Click Save
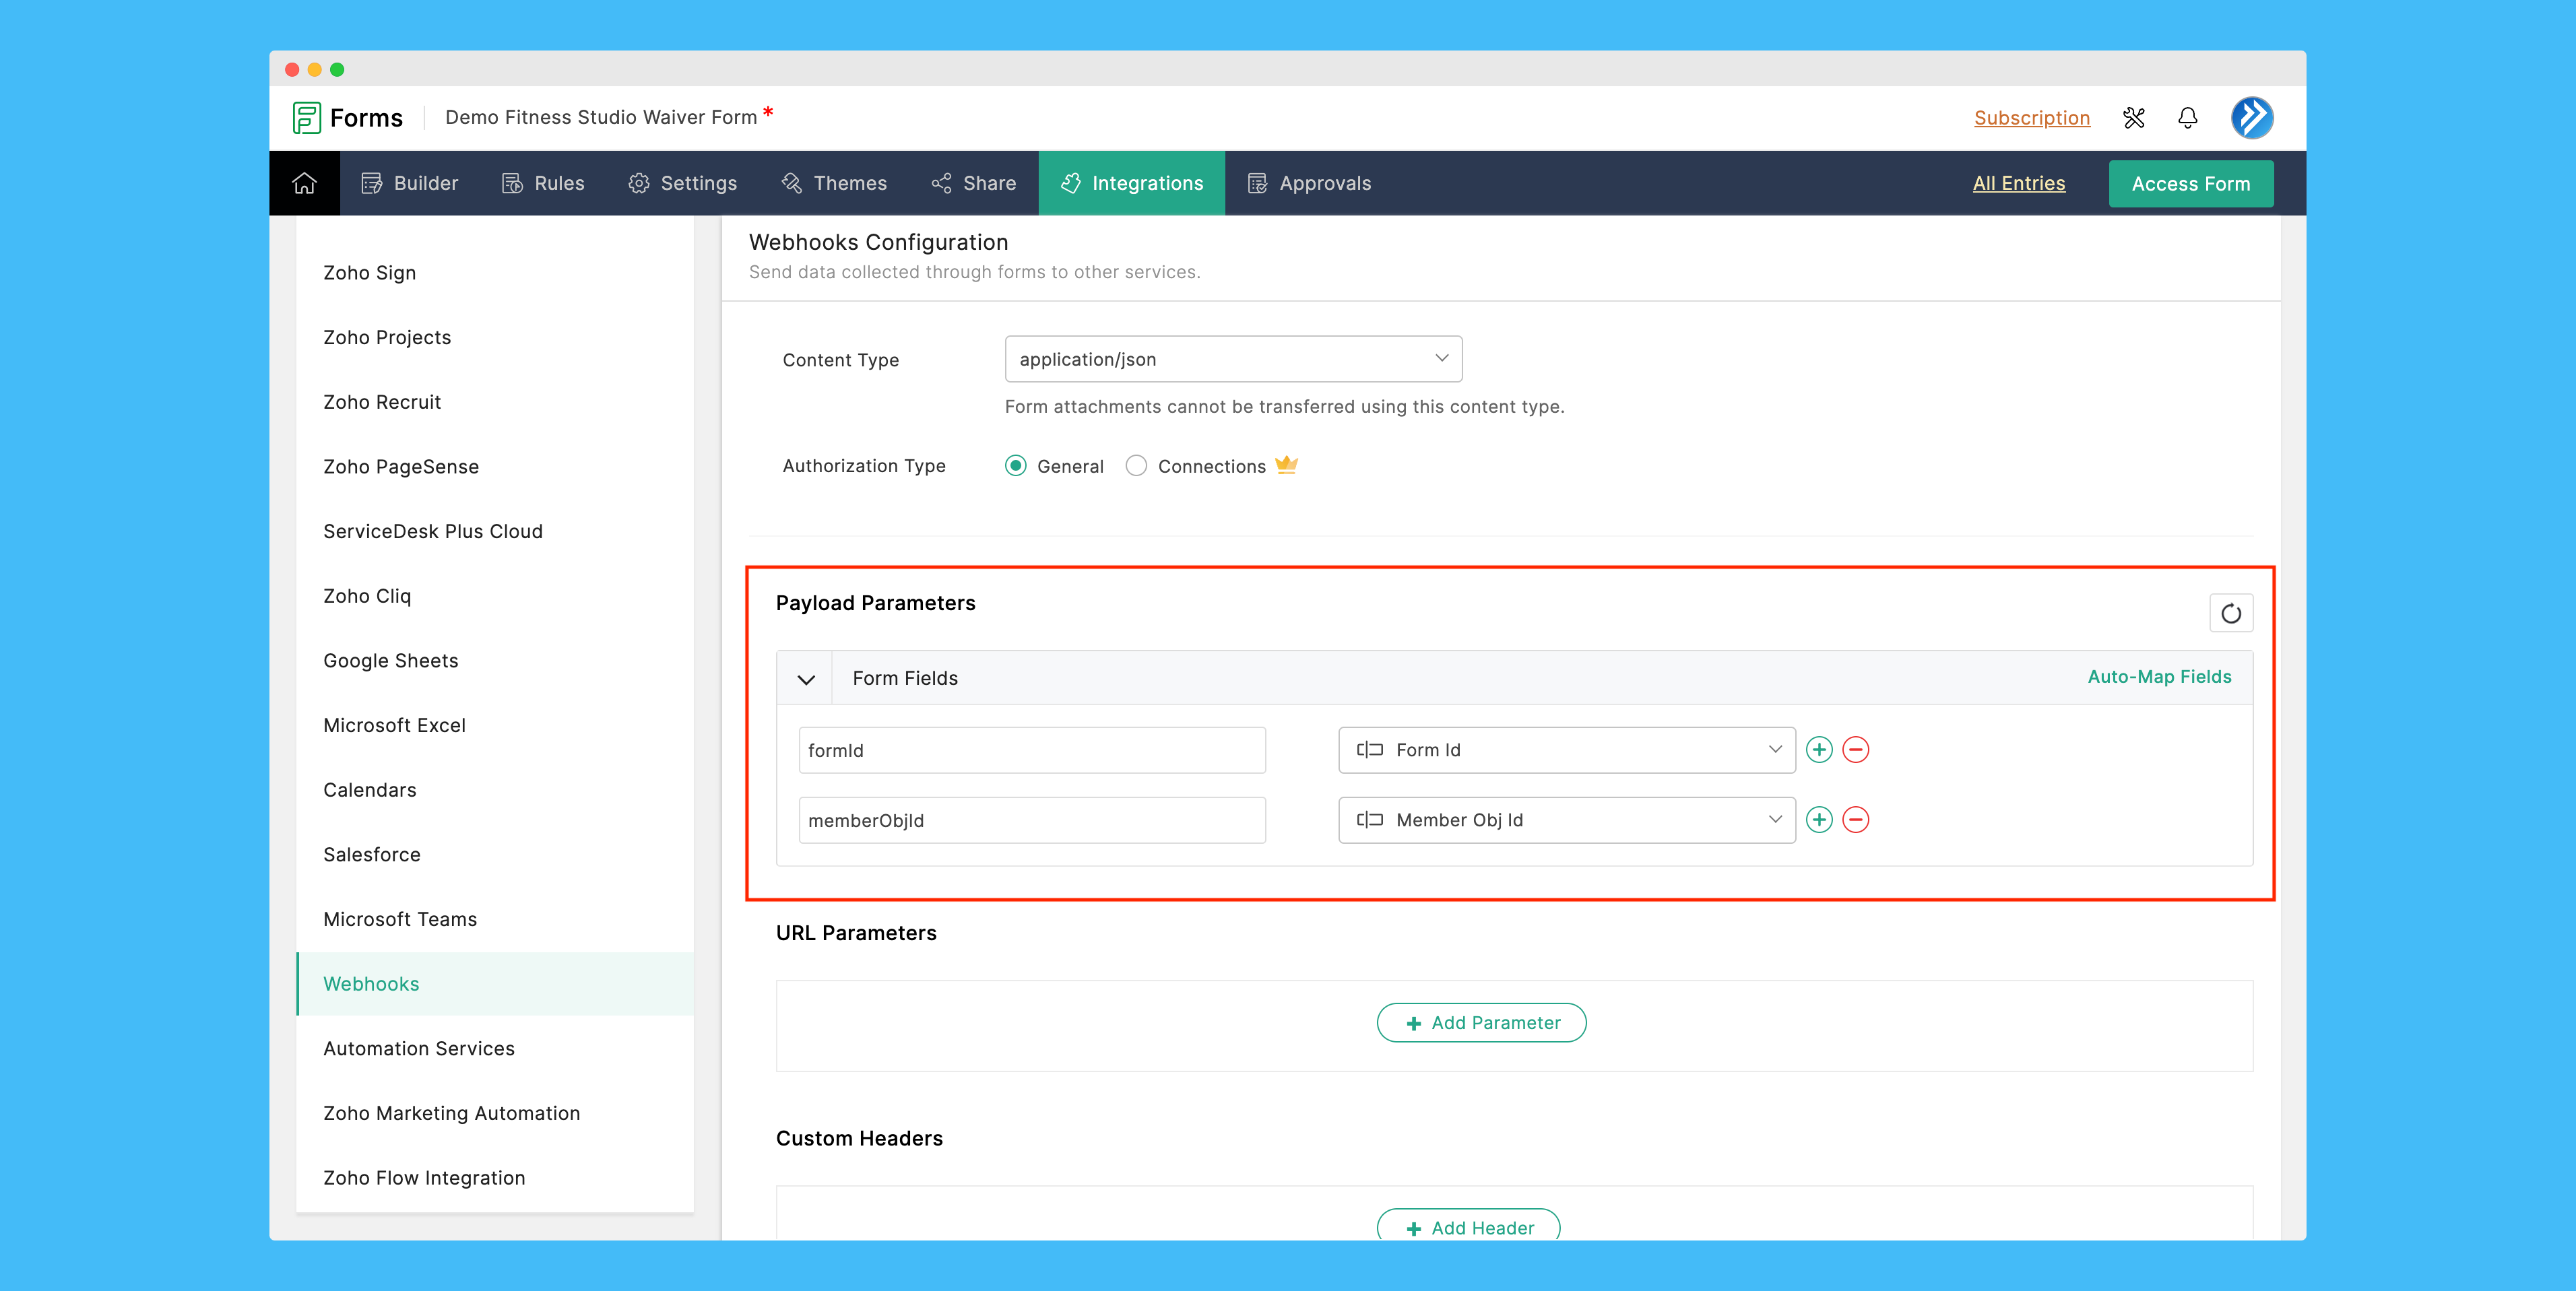
- Inside your form page in Zoho Forms, on the top menu bar click on Integrations
- From the left navigation menu select Webhooks option and click Configure Webhook
- Now for the Webhook URL field, login to your Okfit account
- Goto Account Settings > Authkey And Webhoooks
- Copy the Digital Forms Webhook URL text and paste it in Zoho Forms
- Select Content Type as application/json
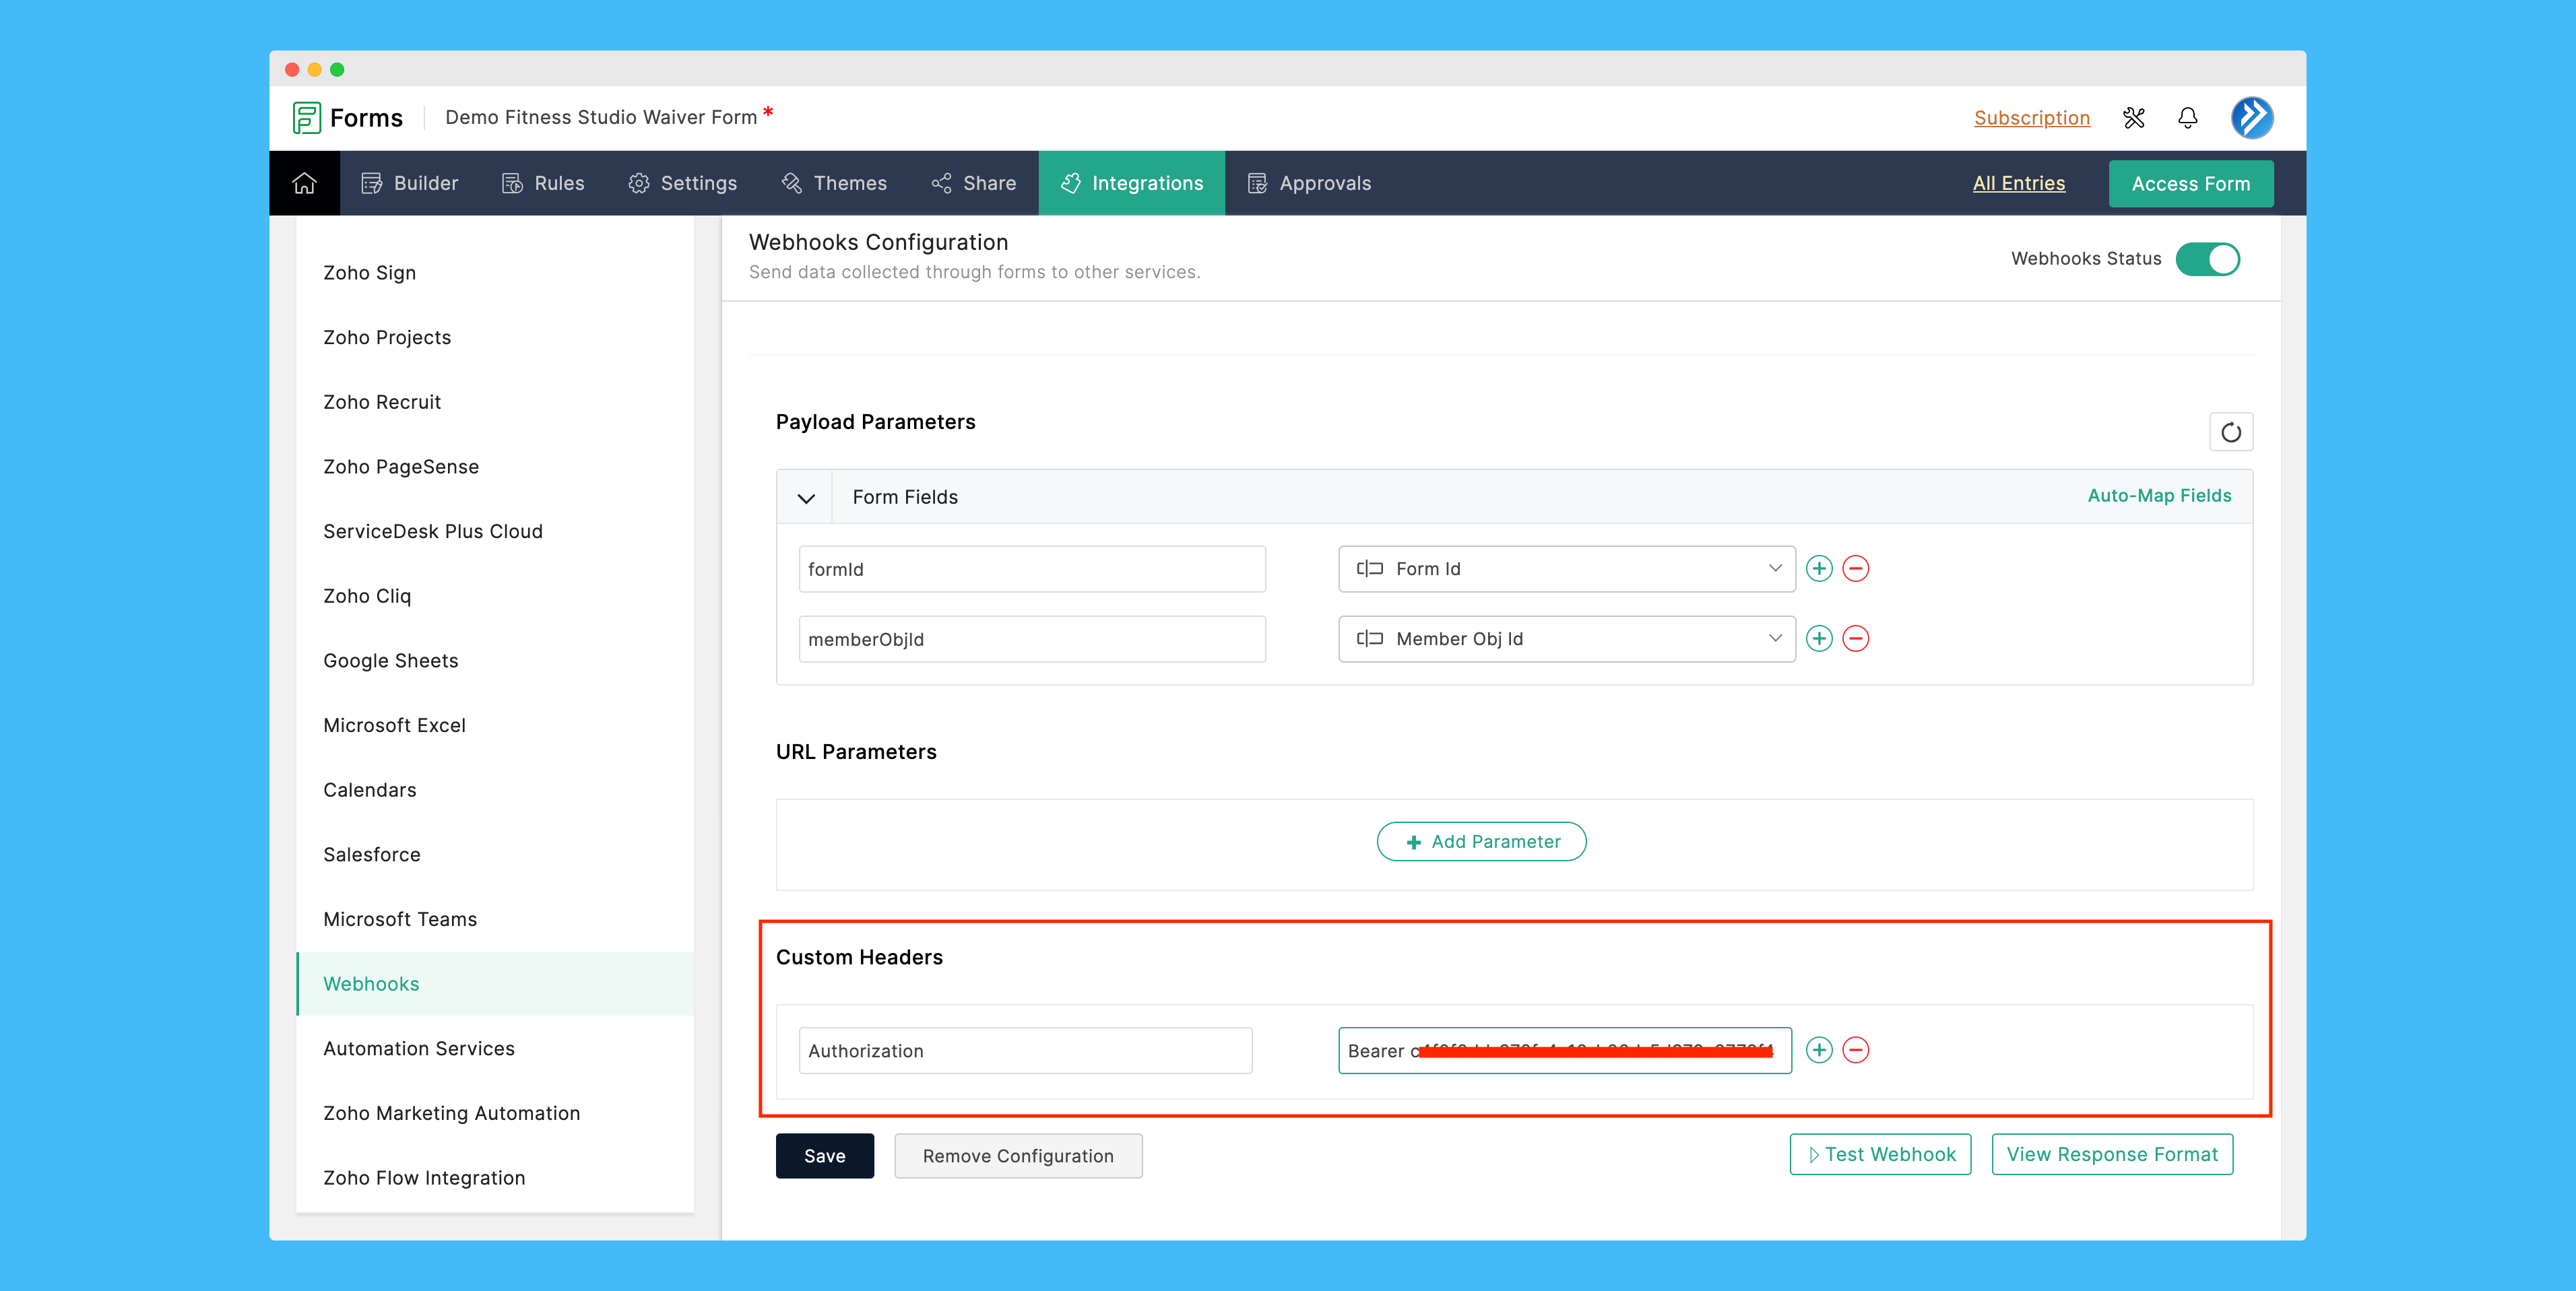
- Under the Payload Parameters enter the form fields as shown in below photo
- Next under Custom Headers click on Add Header.
- In the first field enter Authorization.
- Next goto Account Settings option in Okfit and click on Authkey And Webhooks tab. Copy the Authorization Key.
- Go back to Zoho Forms. In the second field under Custom Headers section, enter Bearer followed by the key copied from Account Settings option.
- It should now look as shown in below photo. Please note, the key has beem masked in the photo.
- Next, click Save
- Click Test Webhook and Run Test and you should see result - Webhook test executed successfully
- Open a new browser tab and login to Okfit
- On the left navigation menu, click on Digital Forms > Add Form
- Enter Form Name to what you want the members to see
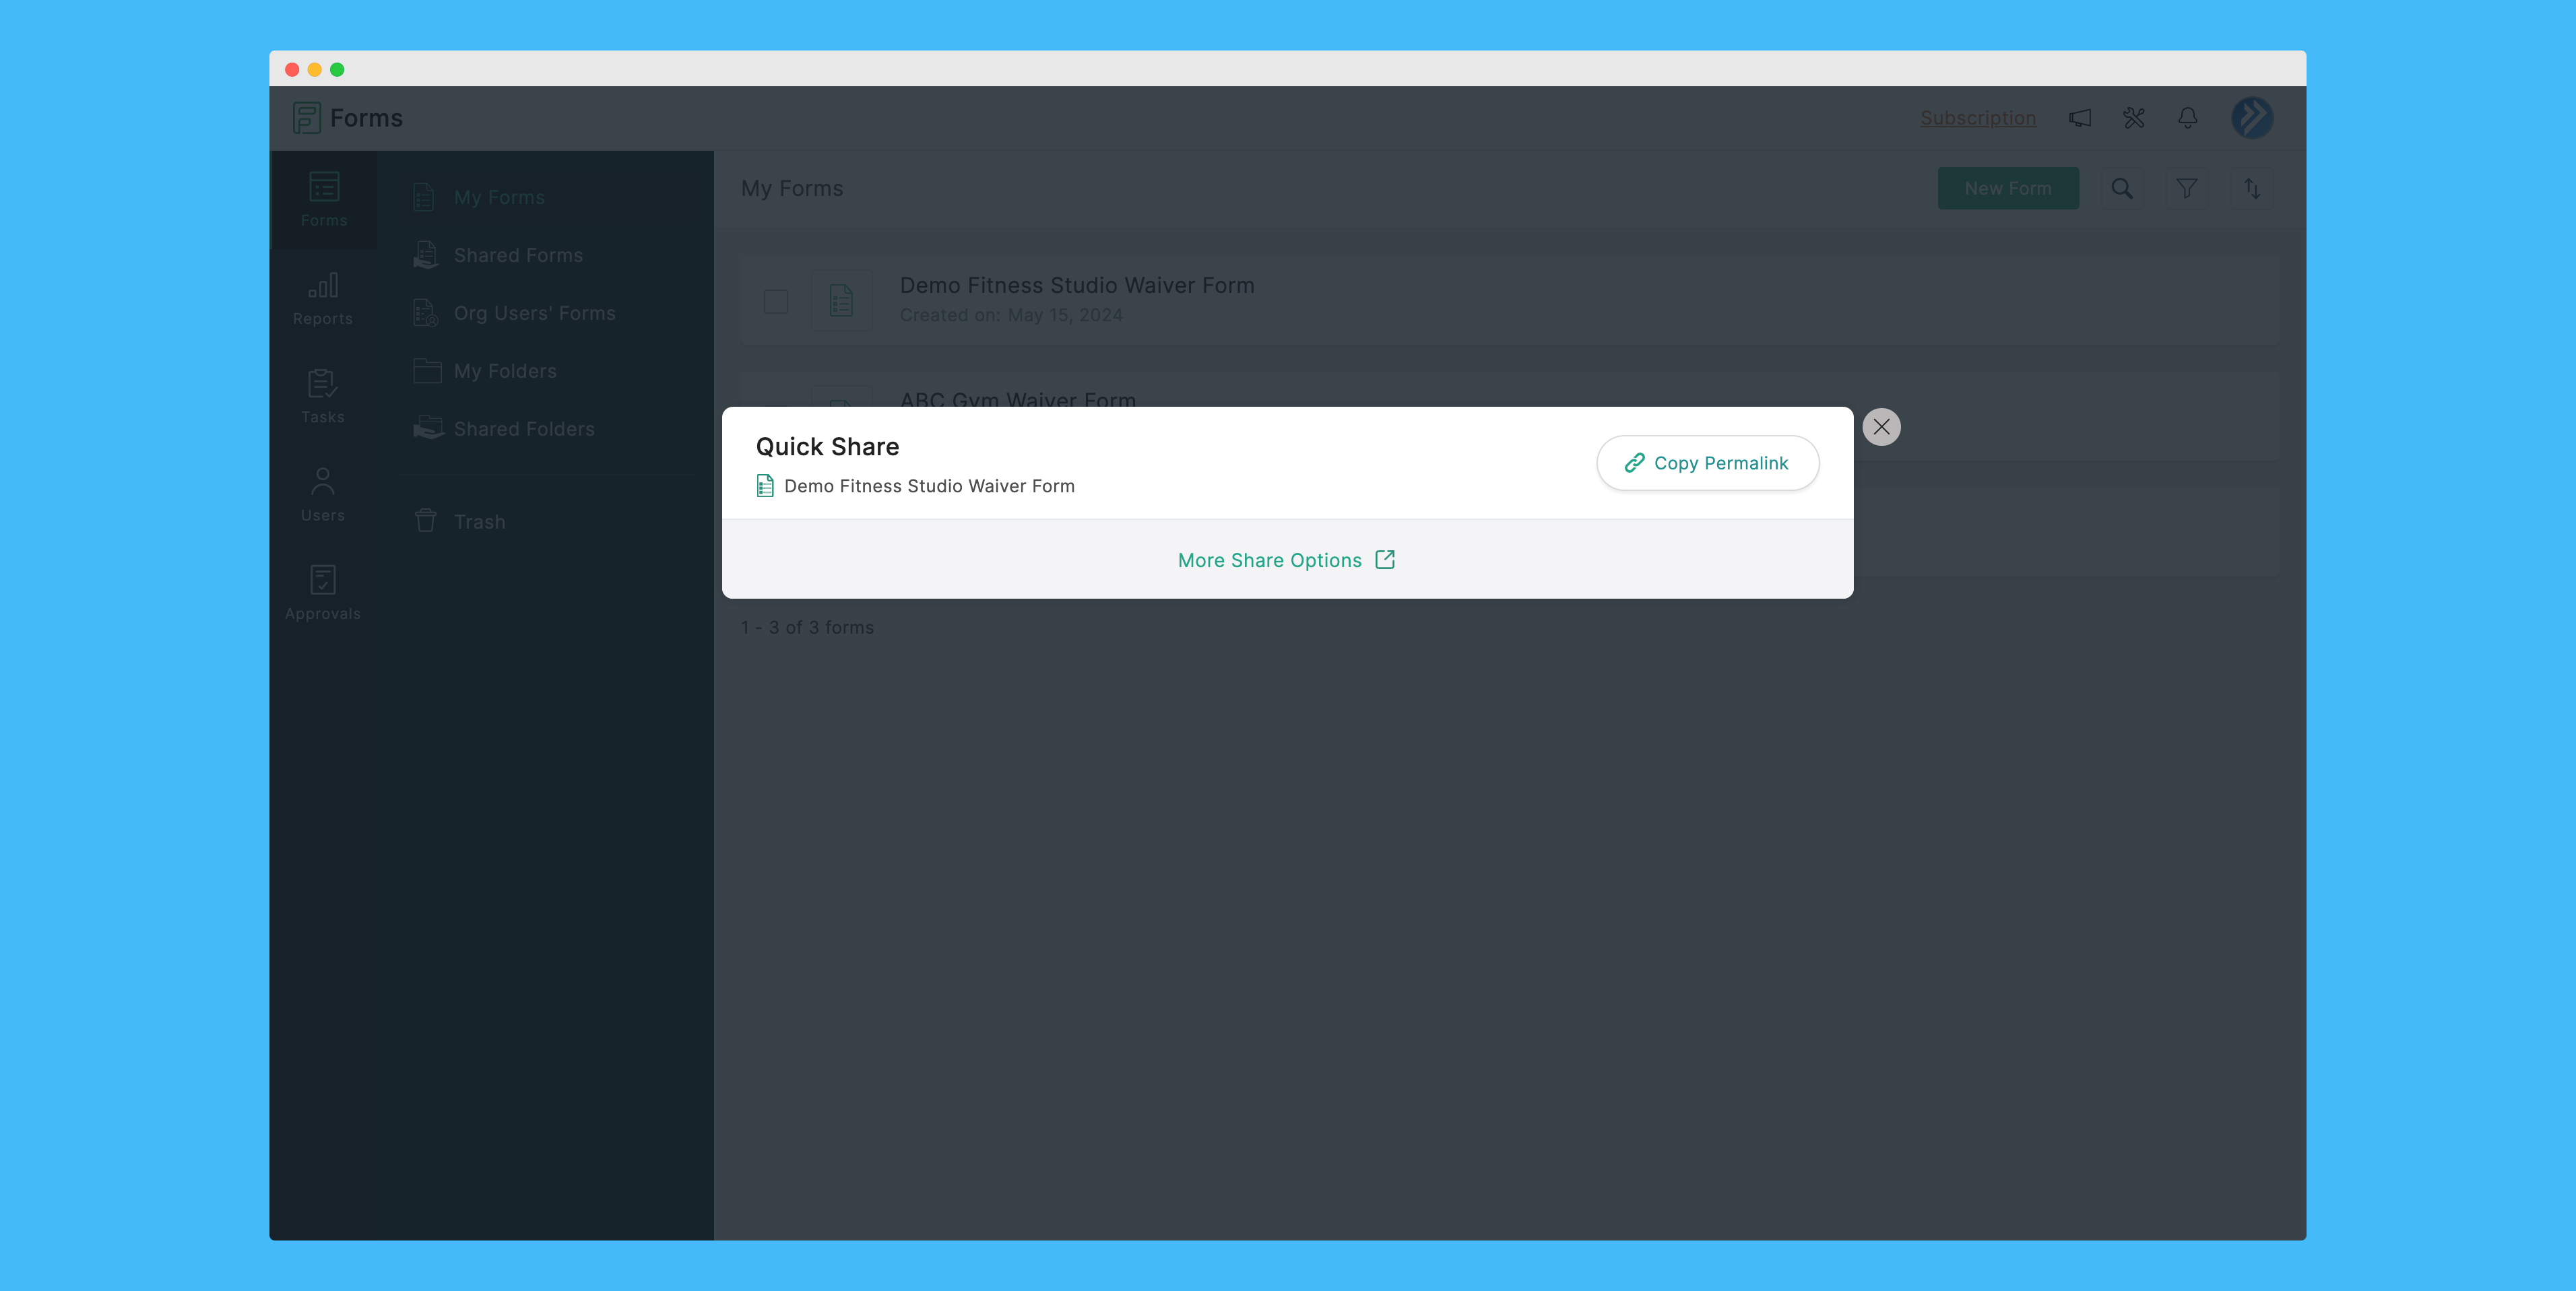
- For Form URL, go back to Zoho Forms > Forms > My Forms
- Hover on the form name and you'll see a Quick Share button
- Click on Quick Share and Copy Permalink
- Go back to Okfit > Add Form and paste the copied link in the Form URL field
- Enter the description of the form and click Finish.
- Click on Save
1. Login to Zoho Forms Account
In case, you do not have an account created, you can Sign Up for free on Zoho Forms website. To sign in to your, click here.
2. Create a Form
Great, now that you have successfuly created your account and logged in, let's create a form
Once the form builder page opens, create the required fields as below
Now that the required fields are created, you can continue to add more fields as per your form requirement and then follow the below steps.
3. Set Field Alias
Once the form is ready, we now have to set up field alias.
4. Setup Webhook
Now we setup the Webhook URL that will be used to send response to your Okfit account.
5. Add Form to Okfit
Now that the form is ready and the webhook has been setup, we can now add this form to our Okfit account.
You can view all your added form in Digital Forms > View Forms option.
You can use the same method to create multiple forms. Please write to [email protected] for any questions.
Love to write about health & fitness?
If you are a fitness enthusiast who loves writing about health & fitness and would like to share with the world, then we are here to help you out. Send in your blog at [email protected] and we shall put it up on our website with due credits absolutely free!